Tel: +86-15560137715 E-mail: alphatoysfactory@gmail.com


Views: 8 Author: Site Editor Publish Time: 2021-12-21 Origin: Site
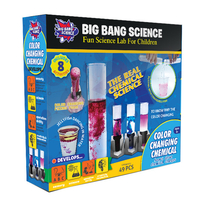
Have children ever wondered what the world would be like without colors? Most people take the existence of colors for granted because they are everywhere: the blue sky, the green grass, the yellow sun, and so on. So do children know about the ternary colors that make up color? Today, the alpha science classroom can help kids understand the science behind colors through DIY Colored Shadows, a physical science experiment for kids. It also allows children to enjoy the fun of kid's science experiments activities.
Alpha Science Classroom: DIY colorful shade making materials
A dark room
A piece of white paper or white poster board
Three small flashlights with similar light intensity
Blue, red and green cellophane
Three rubber bands
One pen
A cardboard box
A ruler or tape measure
Optional. A wide strip of paper (about 5-6 cm or 2 inches)
Alpha science classroom: DIY Colored Shadows, step-by-step tutorial
Step 1: From each cellophane roll (red, blue, and green), kids cut out 5 squares that fit the front of the flashlight with a little extra overlap.
Step 2: Take out 5 squares of one color and fold them over the front of your flashlight. Put a rubber band around the colored cellophane pieces so that they are tightly attached to the flashlight. Repeat step 2 for the other two colors and the flashlight.
Step 3: Children place a piece of white paper or poster board against the wall on a table to act as a screen. Place the cardboard box in front of the white screen. Then turn off all the lights in the room. The room should be relatively dark in order to see the effect of the colors.
Step 4: The children take out the red flashlight and turn it on. Point the flashlight at the white screen. What color is the light you see on the white paper?
Step 5: Children place the flashlight on the cardboard box with the flashlight still on. Adjust the distance between the box and the screen, and the size of the light cone, until you see a nice full circle of light on the white paper screen. Now, take your pen and hold it vertically between the flashlight and the white paper screen. When you look at the screen, what do you see? Is the shading a specific color?
Step 6: Children observe well and while the pen stays in the same position, pick up the ruler and point one end of the ruler toward the center of the red flashlight. Point the other end toward the screen so that it touches the shadows you see on the screen.
Step 7: Children turn off the red flashlight and repeat steps 1, 2, and 3 with the blue and green flashlights. how does their light look on the screen? Does the color of the shadows change with each color?

Step 8: The children pick up the red and green flashlights and turn them both on. Place the flashlights next to each other on the cardboard box so that they are both pointing at the screen. Make sure that the size of the two apertures is the same. Now move the red flashlight so that the red aperture coincides with the green aperture on the screen. What happens once the green light overlaps with the red light?
Step 9: With the children still overlapping the green and red light, pick up your pen again and place it vertically between the light and the screen. Do you see any shadows of the pen on the screen? How many are there? What color are they?
Step 10: The children change the green flashlight to a blue one. Place it on the carton so that the blue and red circles overlap again.
Step 11: Children pick up their pen again and hold it vertically between the light and the screen.
Step 12: Children now replace the red flashlight with a green one. Combine the circles of color on the white screen again.
Finally, children leave the green and blue flashlights on the cardboard box and add the red ones. Try to combine these three colors of circles into one. What do the colors look like when they are mixed?
Children place their pen vertically between the three lights and the white screen. What can you see on the screen? Is there more than one shade? How many are there? What is the color of each of them? Where do you think they are coming from?
Alpha Science Classroom: DIY colored shadows, the science behind
How many different colored shadows did the children create by mixing colors? Probably a lot. This physical science experiment for kids is an example of color addition, which means that you superimpose two or three beams of light and mix them into different colors. This is how many TVs and computer monitors work, using only the three primary colors of red, blue, and green to produce a variety of colors.
The alpha science classroom tells children that if you have only one beam of light shining on your screen (red, blue, or green), the light on your screen should have the same color. Holding the pen between the light and the screen results in only one shade, and that is black. To understand shadows, you need to know that light travels in a straight line. You do see this when you use a ruler to connect the light source to the shadow on the wall. You may have noticed that the pen is always directly on the same line as the ruler, which means that the shadows on the wall are created exactly where the pen blocks all the light from the flashlight. Now, when you start combining the two colors, the spots on the wall should have changed to a different color. Each combination of lights produces a different stimulus for your visual cone cells, and depending on the signals the cone cells send to your brain, you will perceive a different color. Red and green combine to become yellow; red and blue become a pink color called magenta; and blue and green become a light blue-green color called cyan. All of these colors are called secondary colors because they are made up of two primary colors. A good way to display all three primary colors, red, blue, and green, is to overlap only all three aperture sections on the screen.
When you place the pen between the light of the two combined colors and the wall, you will see two shadows; each with one of the two light sources. Again, this is due to the fact that light travels in a straight line, and if you do the extra activity, you should see that if you place the pen directly on the line of the ruler pointing from the red flashlight to the wall, the shadow created at the other end of the ruler should be green. This means that in the path along the ruler, the pen is blocking the red light and creating a shadow. However, when you point the ruler at the green flashlight, you may notice that the path of the green light is not blocked by the pen, which is why the shadows look green. When you add a third color and combine all three primary colors, the resulting color is white. We feel "white" when all types of cone cells are equally stimulated, which is what happens when you combine all three primary colors.
The alpha science classroom hopes that this kid's science experiment program will help children understand the scientific principles, explore the different mysteries of color, and become the most powerful color wizard.
Alpha Science Toys also designed interesting children's physical science experiment kits for children. Through different physical science experiment projects and methods, children can unlock different physical science mysteries and become masters of science.